Showing posts with label Kids. Show all posts

Thursday, April 1, 2010

Yoshino


Completed: March 2010

Pattern: Oriental Lily, by Georgie Hallam

Yarn: Rowan Purelife Organic Cotton DK (100% organic cottn), #986, 3 x 131yd/50g; #983, 1 x 131yd/50g; #982, 0.2 x 131yd/50g

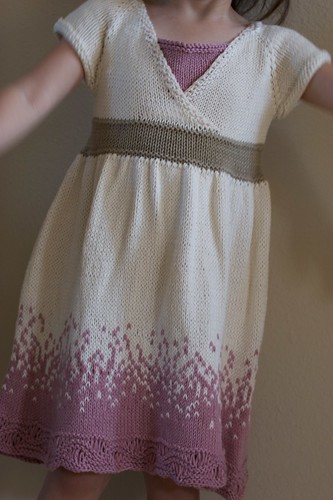
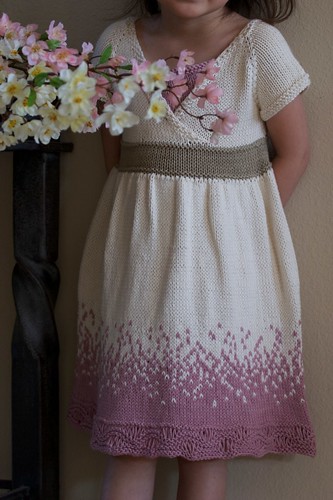
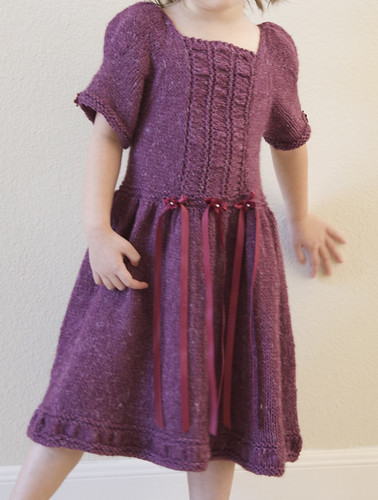
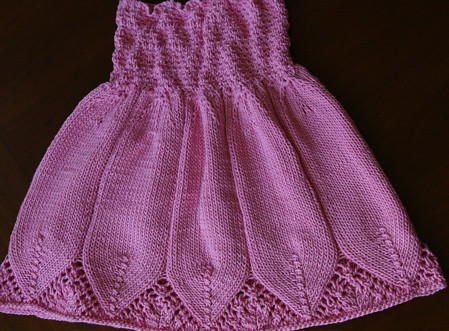
Notes: My inspiration for this dress was the cherry blossom tree. I love the fluffy white blooms that gradually turn more pink before eventually cascading down and covering the ground. At our previous house, we had Yoshino trees that would herald the arrival of spring, and it always made me smile to look at them.


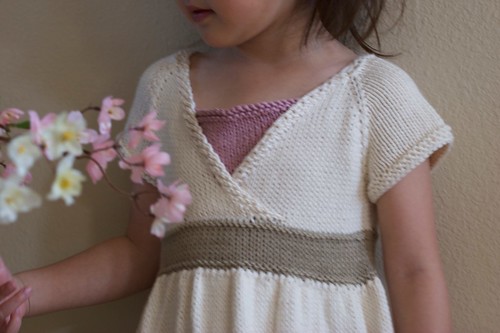
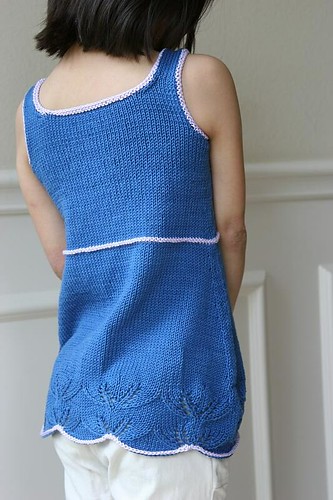
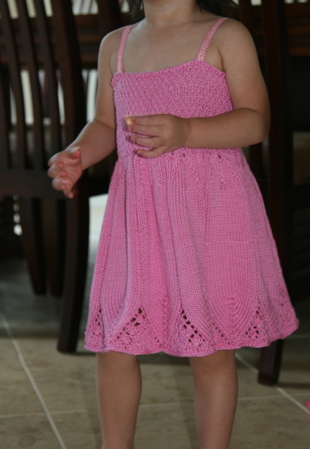
I used the Oriental Lily pattern to give me some guidelines for knitting the surplice top. I continued making increases until the top fit my daughter, who is a petite 4-year-old (I started this before the designer updated the pattern to include larger sizes).


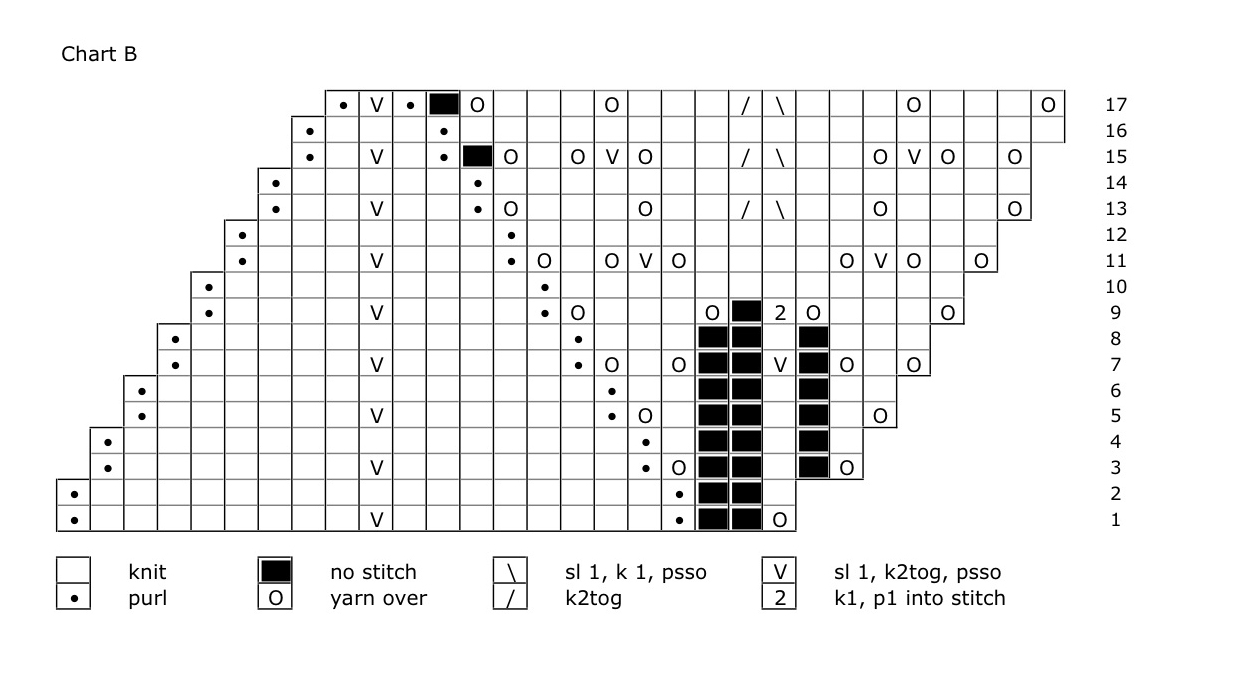
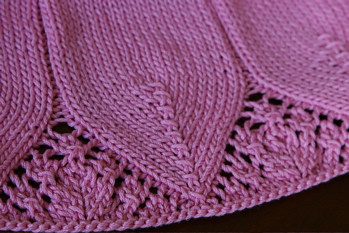
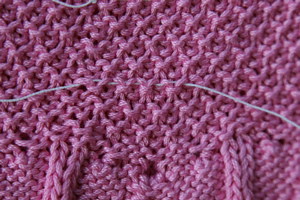
The sash was done by knitting 1 round, purling 1 round, knitting 6 rounds, and finally purling 1 round. After switching colors and knitting 1 round for the skirt, I doubled the stitch count by knitting into the front and back of each stitch. The skirt is knit straight after that. The color transition at the bottom of the skirt was done with the help of a random number generator (I discuss this further on the main blog). The bottom of the skirt has a modified seafoam stitch.


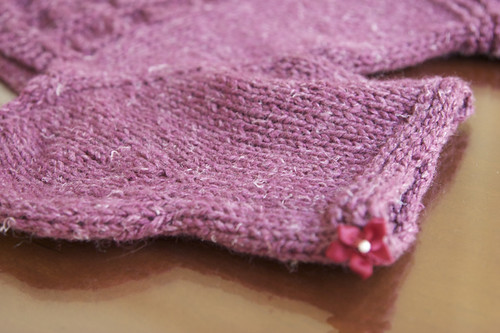
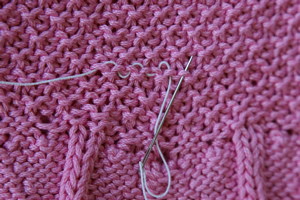
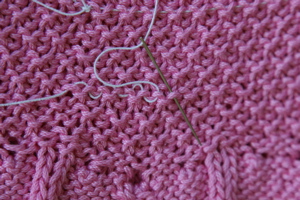
The sleeves are obviously short and have a garter-stitch hem. I knit a small triangle to sew behind the surplice bodice, both for modesty and to bring the pink color to the top.


Monday, March 15, 2010

Austen


Completed: December 2009

Pattern: my own

Yarn: Plymouth Yarn Royal Llama Linen (40% fine llama, 35% silk, 25% linen), #1553, 6x 10⁹yd/50g

Notes: The dress is knit top-down with raglan sleeves. I initially cast on 44 stitches, using 2 for the front panel, 10 for each sleeve, and 20 for the back. Extra increases were done to add a bit of puffiness to the upper sleeve. After the main part of the bodice was completed, stitches were picked up along the right front panel, and then the middle ruched section was knit horizontally and then grafted to the left front panel. Afterwards, stitches were picked up along the waist edge. After a few rows of garter stitch, the stitch count was doubled by knitting into the front and back of each stitch, and the remainder of the skirt was knit from the top down.


Vine Lace Cardigan II


Completed: November 2009

Pattern: Vine Lace Cardigan, by SweaterBabe

Yarn: GGH Bel Air (90% merino wool, 10% nylon), #09, 5 x 142y/50g

Notes: It's not often that I knit a pattern twice, so it's a testament to how much I like this design that I started knitting it again right after finishing the first. For this version, I knit it at 4st/in to fit my daughter.

On the body, I did not do any decreases for the waist or for the ribbing section, but I did do increases after the ribbing. I did about 10 extra rows at the bottom (because of the significant row gauge differences) and added an extra buttonhole. Otherwise, I pretty much did the same things I had done on the version of this that I had made to fit myself.


The yarn is extra soft and cushy (my daughter’s skin is really sensitive, and she just loves it), yet also very light. I did have a knot or two in every ball, though, and that was a big drawback. It also tends to fuzz up pretty quickly, but that’s nothing a shaver can’t take care of.

Monday, June 30, 2008

Black Dog Tank


Completed: June 2008

Pattern:Beaded Cami, Black Dog Designs, by Nora

Yarn: Rowan Glace (100% cotton), #817, 4x 125yd/50g; Rowan Glace (100% cotton), #811, remnants

Notes:
I modified Nora's beautiful design into a tank for my daughter and knit it bottom-up in the round. The bottom section maintains the A-line shape, whereas the top is more fitted. The lace motif is repeated just once and centered for the top section. My daughter wanted to add lavender accents, and amazingly, I happened to have some leftover lavender Glace in my stash, so it worked out perfectly. The purl ridge row was added by first knitting 1 row in lavender and then purling the 2nd row before switching back to blue. The bottom edging was done after the main knitting was completed, and it came about because I messed up. I was so eager to get started that I went right to the directions for the lace and forgot to do the 2 rows of garter stitch that the pattern called for! So I went back and picked up stitches along the bottom edge using the lavender yarn, and then bound off in purl. The armhole and neck edge got a more substantial treatment--picked up stitches, purled 1 row, and then bound off in knit. I kept the bottom edging simpler because I didn't want it to overwhelm the scallops.

Thursday, June 12, 2008

Flora Dress


Completed: June 2008

Pattern: my own


Notes: This dress is knit from the top down and uses a bit of shirring in the bodice to ensure a good fit. The bodice is done in dot stitch, which reminds me of a flower center. The top of each "petal" in the skirt has slip-stitch and eyelet detailing. The petal tips and lace inserts are adapted from the Hemlock Ring Blanket.

Additional sizes added on 6/13/08. Edited 6/24/08 to correct error in Chart A.

SIZES
3-6 mo, to fit 15-17" chest
9-12 mo, to fit 17-19" chest
2 yrs, to fit 19-21" chest
4 yrs, to fit 21-23" chest
6 yrs, to fit 23-25" chest

FINISHED MEASUREMENTS
Chest: 16[18,20,22,24] inches before shirring
Length: 13[14,16,18,20] inches

YARN
Tahki Cotton Classic [100% mercerized cotton; 108yd/100m per 50g skein]; color: 3449; 3[4,4,5,6] skeins

NEEDLES
1 US #6/4 mm circular needle, 16 inches
1 US #6/4 mm circular needle, 32 inches
Or size to obtain gauge

NOTIONS
Stitch marker
Tapestry needle
Sewing needle with large eye
Elastic thread
Fray Check
Ribbon
Thread

GAUGE
22 sts/26 rows = 4 inches in dot pattern
20 sts/26 rows = 4 inches in stockinette

It is more essential to get stitch gauge in dot pattern

STITCH GUIDE
Dot Pattern
Round 1: *P1, k1; repeat from * to end.
Round 2: Knit.
Round 3: *K1, p1; repeat from * to end.
Round 4: Knit.
Repeat rounds 1-4 for pattern.

DIRECTIONS
Bodice
Using shorter circular needles and cable cast on, CO 88[100,110,122,132] sts. Place marker and join to begin working in the round, being careful not to twist.

Work dot pattern for 4[4.5,5,5.5,6.25] inches, ending with round 1 or round 3.


Sizes 3-6 mo, 2 yrs, 6 yrs:
*P1, k9 tbl, p1, repeat from * to end.

Sizes 9-12 mo, 4 yrs:
P1, k9, p2tog, *p1, k9 tbl, p1, repeat from * to end.

Skirt
Work Chart A 8[9,10,11,12] times across sts (click for larger image). Switch to longer circular needles after completing row 1.


Repeat row 11 of Chart A till work measures 10[11,13,15,17] inches from cast on edge, or until desired length before transitioning to lace section (lace section will be 3 inches in length).

Work Chart B 8[9,10,11,12] times across sts (click for larger image).


Next round, knit across all sts.

Bind off in purl.

Finishing

Weave in ends. Block.

Cut 5 16[18, 20, 22, 24] inch strands of elastic thread . Turn garment inside-out. Starting with the 2nd row of purl bumps from the top, weave elastic under purl bumps as shown.


Tie square knot in elastic, leaving 1-1/2” tail on both ends. Repeat using remaining strands of elastic thread, distributing the rows of elastic evenly over the length of the bodice. Try garment on. Adjust elastic thread if necessary to ensure comfortable fit. Trim ends. Dab Fray Check onto knot and elastic thread ends; weave in ends.

Sew ribbons into place for straps.


Monday, August 6, 2007

Summertime Tunic 2


Completed: August 2007

Pattern: Summertime Tunic, Interweave Knits

Yarn: Rowan Calmer #475 (75% cotton, 25% acrylic), 2 x 50g balls (175yds each)

Notes: I basically just scaled down a version of this for my Sweetie since she liked mine so much. The main thing I changed for hers was that I divided the stitches nearly evenly for the front as for the back since a 7-year-old doesn't need much shaping. I probably could have also omitted the keyhole opening in the front. Anyway, she loves it and had fun picking out the ribbon. We decided to tie the ribbons at the shoulders instead of in front, just to add that extra girly touch!

Tuesday, May 22, 2007

iCutie


Completed: May 2007

Pattern: my own, with Apple motif from sources below

Yarn: Cotton-ease (50% cotton, 50% acrylic), 1 x 100g skein (207 yds) of main color (MC) and scrap amounts of contrast color (CC). I used bubblegum pink (discontinued) and white.

Needles: US #6 circular

Gauge: 18sts, 28 rows = 4"x4" in stockinette

Size: 18 months

Finished Measurements: Width 20", Length from shoulder to hem 12-1/2"

Notes: SM="slip marker," RM="remove marker". The sleeves are designed to have just a tiny bit of puffiness to them. In addition to being used for the duplicate stitching, the contrast color is used to add a bit of interest to the collar, sleeve, and hem, but this is completely optional.

Instructions:
With MC, CO 12 sts, PM (back R shoulder), CO 14 sts, PM (front R shoulder), CO 24 sts, PM (front L shoulder), CO 14 sts, PM (back L shoulder), CO 12 sts (76 sts total). Leave long tail to work crochet for button loop.

Row 1 (RS): K with MC
Row 2 (WS): P with CC
Row 3: P with MC (continue to use MC until indicated)
Row 4: P

Rows 5-16:
-on odd rows, K, inc 1 stitch before and after each marker
-on even rows: P

Row 17: join to knit in the round, PM to indicate start of round.
Cont to inc 1 stitch before and after each marker every other round, a total of 9 times, until there are 148 sts total (32 for each shoulder, 42 for each front and back).

Next round, K 21 sts, SM, K 11 sts, K next 10 sts with CC, K 11 sts with MC, SM, K 42 sts, SM, K 11 sts, K next 10 sts with CC, K remainder of round with MC (SM as needed)

Next round, K 21 sts, SM, K 11 sts, P 10 sts, K 11 sts, SM, K 42 sts, SM, K 11 sts, P 10 sts, K remainder of round with MC (SM as needed)

Next round, K 21 sts, SM, K 11 sts, k2tog 5 times, K 11 sts, SM, K 42 sts, SM, K 11 sts, k2tog 5 times, K remainder of round (SM as needed)

Next round, K 21 sts, RM, BO 27 sts, RM, K 42 sts, RM, BO 27 sts, RM, K remainder of round

Next round, K 21 sts, CO 4 sts, K 42 sts, CO 4 sts, K 21 sts

Cont in stockinette till work measures 10-1/2”.

*K 1 round in CC. P 1 round in MC. Repeat from * 1 time. K 1 round in MC. BO.

Finishing: Single-crochet button loop in back. Sew on button. Weave in all ends.

Use duplicate stitch to add design. You can use the Apple motif from The Blue Blog or Knit One Drop Two. The chart for "iCutie" is


Sunday, January 14, 2007

Soul Skirt


Completed: January 2007

Pattern: Soul Tube Top, Rowan Calmer Collection

Yarn: Rowan Calmer #471 (75% cotton, 25% acrylic), 2-1/2 x 50g balls (175yds each)

Notes: I knit this in the round instead of flat, the way the instructions say. This resulted in some unsightly holes along the side, where the cables met up. It was easy enough to reign this in after I finished knitting, by strategically weaving in the ends, but you might want to stick with doing it flat.


This started out as a tube top for me, but it got converted to a skirt for my daughter. To do this, I followed the directions up to the point of the waist decreases. I did not do any of the waist increases. Instead, I just knit straight till I was about 3 inches shy of the desired length. I then switched to smaller needles (from size 8 down to size 6) and knit straight for another 2 inches, completing a cable twist for the serpentine cables. On the next row, I decreased 2 stitches at the top of each cable to prevent them from stretching out and also to get the right size for the waistband. The waistband is just 8 rows of stockinette, 1 row of purl (to make it easier to turn in), and then another 8 rows of stockinette. Since I'm not a big fan of sewing by hand, I folded the waistband over at this point and then knit in the waistband--just as you would knit in a hem--leaving a 1" hole to put in the elastic. I then turned the work over and went back the other way to bind off. After putting in the waistband elastic, I only had a small hole to sew up.