
Supplies
sock blank
markers
stencils (optional)
tapestry needle
yarn or thread
dowel

Instructions
1. Block the sock blank. Despite having a ribbed edging on either side, my sock blank curled a lot when I first took it out of the package, and it needed to be blocked. I was tempted to use SOAK. It probably would have been okay, but I was skittish about whether that would affect how the fabric would take up the color afterwards, so I just used water to wet block.
2. Lay out the sock blank, making sure to orient the edge that unravels at the bottom. It is a good idea to have something underneath to protect your work surface. I had blocked mine on top of a foam playmat, and I just left it on that.
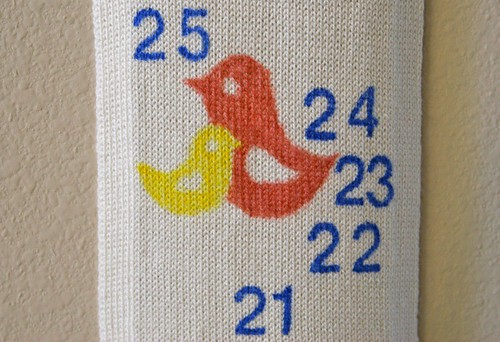
3. Measure the length of the sock blank and calculate how big your numbers can be. You want to make sure that the numbers don't overlap. Remember to allow 2-4" at the top to form a casing for the hanging dowel. I was able to make my numbers 1" high, with 1/4" vertical distance between numbers.
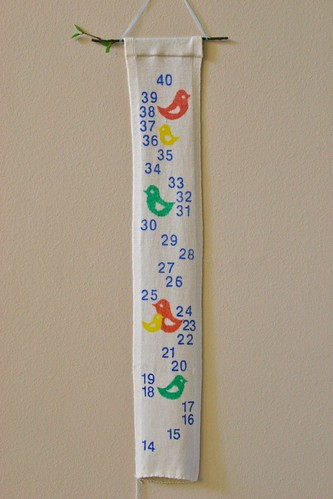
4. Draw in your numbers and graphics.
a. I used stencils in an easy-to-read font (Helvetica). They were translucent, which made it simple to line things up. The graphics were inspired by a baby shower theme at Hostess with the Mostess.
b. The markers I used were Le Plume II by Marvy Uchida. I like them because the marker tips give you good control without skimping on coverage. If you're used to how these markers look on paper, though, keep in mind that the colors will be much more saturated on the knit fabric--more like the color of the marker tip rather than the cap. In case you're wondering, I also experimented with fabric paint, but that did not work at all; it was messy and clumpy.
c. Be patient with the markers, allowing time for the knit fabric to take up the color. I found that a stippling motion helped.

5. Fold down the top 1-2" towards the back. Use the tapestry needle with either yarn or thread to sew down the edge, making a casing.
7. Insert dowel and hang.
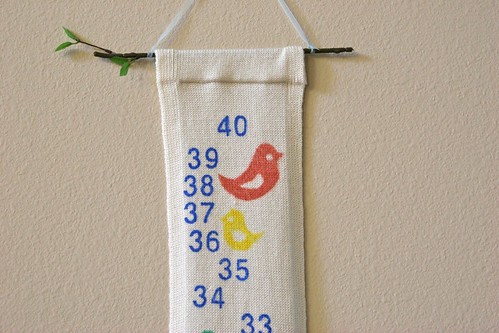
Have fun unraveling!
4 comments:
It should go along with a pattern for a baby sweater, booties, etc. The item(s) should be knit in increments while unraveling. That way, when you finish unraveling, you also have a finished garment!
Saw this on Craft! You make such beautiful things, and this idea is really sweet.
Nice post. It is really interesting. Thanks for sharing the post!
Fridge Online Shopping | Refrigerator Online Shopping
Refrigerator Price Online | Online Fridge Price
Washing Machine Sale | Washing Machine Online Offers
Mobile Phone Offers Online | Buy Mobile Online
Sathya Online Shopping
this blog its very helpful to implement in our work
German Language Classes in Chennai | German Institute in Chennai | German Language Course in Chennai
Post a Comment